
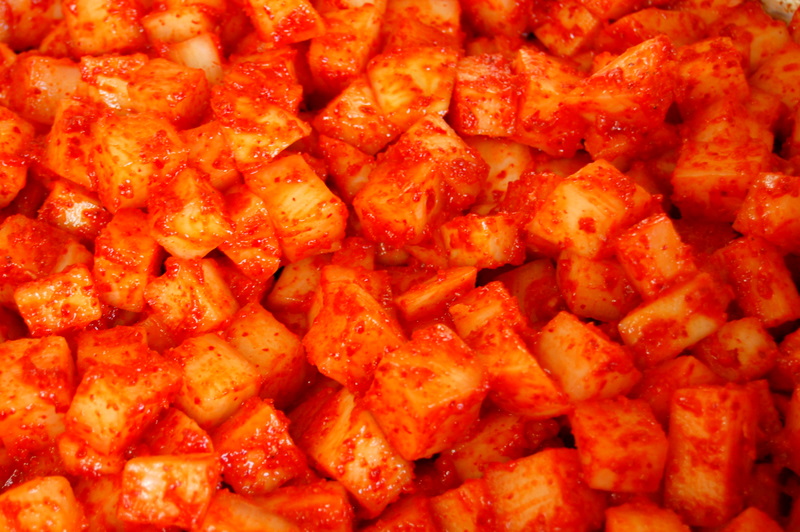
깍두기– Kkakdugi (Kkak-du-gi/Kkaktugi) Cubed Radish Kimchi
January 2, 2012 § 5 Comments
Can you think of a better way to start off the new year than with a huge batch of delicious, spicy cubed radish kimchi (kkakdugi)?
I can’t.
🙂
Now that I have the green light to reintroduce spicy foods back into my post-cleanse diet, I am so excited to share this delicious kimchi recipe with you. For me, this is easier to make than regular kimchi, as the marinade/sauce is super-simple and the process is much less time-consuming. And did I mention that it is outrageously tasty?
Oh, and the prep-cooking-time takes only around 1 hour. (That one was for you, superspy.)
Notes:
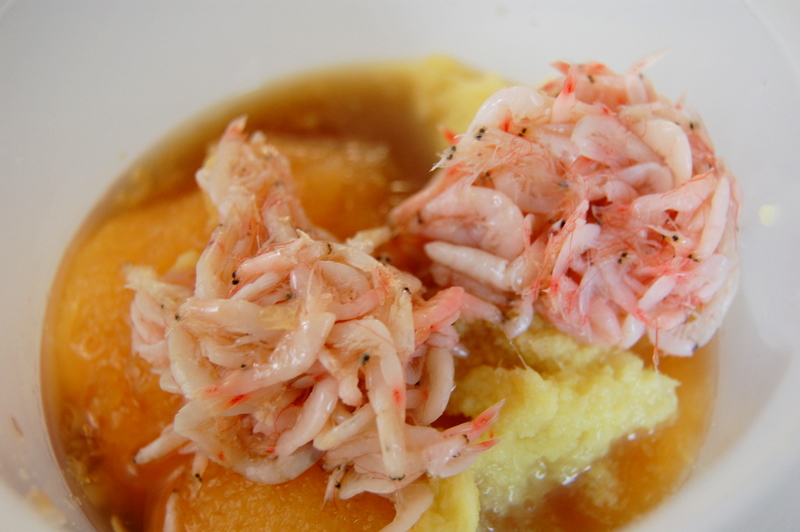
1. Please don’t be frightened to use salted shrimp, they’re really quite delicious and I call them Asian Anchovies. And, they will practically dissolve in the liquid the kkakdugi will give off during the fermentation process, so no need to fear!
2. Try to use sweet rice flour, I recommend Mochiko. Of course, I didn’t have any at home so I ground up some rinsed and dried sweet rice into a powder and it worked just fine.
3. If your spice-tolerance is not quite Cozybogie-level, feel free to use 1 cup of red chili powder.
4. This tastes especially amazing with a hearty-meaty soup, like my ox-tail gori gom-tang.


깍두기– Kkakdugi (Kkak-du-gi/Kkaktugi) Cubed Radish Kimchi
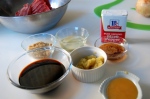
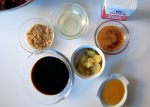
Ingredients
- 8-9 lbs Korean radish (around 3 medium-large radish)
- 1/2 cup VERY coarse sea salt
- 2 tbsp sweet rice flour
- 3/4 cup water
- 4 tbsp minced garlic
- 2 tsp grated ginger
- 2 tbsp fish sauce
- 2 tbsp salted shrimp
- 1 1/4 cup Korean red chili powder (must be Korean gochukaru)
- 1 tbsp sugar
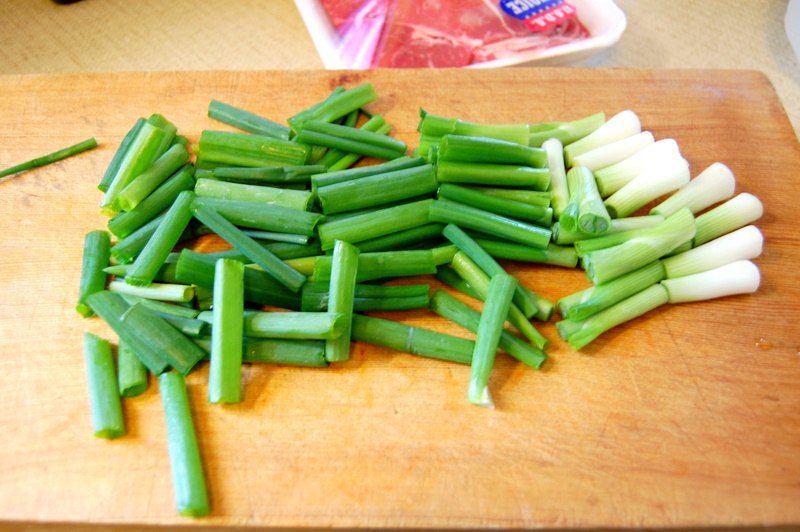
- 8-9 green onion stalks, cut into 1.5 inch pieces
Directions
- Clean, peel and dice your radish into cubes. I like my radish cubes to be on the smaller side (around 1.5 times bigger than a game-dice) but feel free to cube them however you’d like (but I would keep them MAX 1.5 inch cubes).
- In a HUGE metal bowl, sprinkle 1/2 cup of the coarse sea salt and using kitchen gloves, mix well so that all of the radish are coated evenly with the salt. Marinate for 30 minutes.
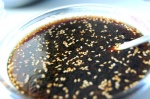
- While the radish is being salted, assemble your marinade ingredients. First, mix the sweet rice flour with the water and microwave it for around one minute, and then stirring well to mix, and microwaving it for an additional 20 seconds. You should have a nice paste. Set aside and cool completely.
- In another bowl, assemble the rest of your marinade – garlic, ginger, fish sauce, salted shrimp, sugar, and gochukaru. Mix gently, and then when the sweet rice paste is cooled, mix all of the ingredients together until it forms a nice paste.
- Carefully drain the radish from the liquid it has given off, and rinse half of the radish with water and drain. Add it back to the bowl with all of the radish (there should be no liquid) and add the sauce.
- Using the kitchen gloves, carefully mix all of the radish so that every piece is coated generously with the sauce. Add the green onion and toss a few more times, and then transfer the mixture into air-tight containers.
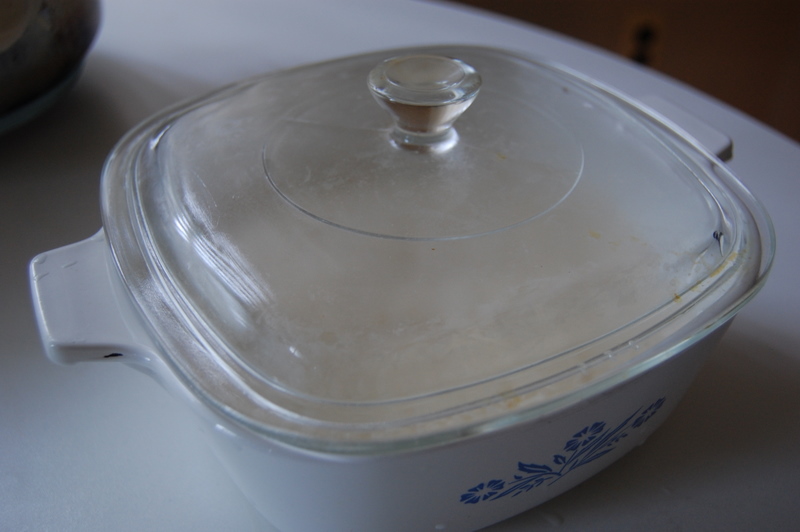
- If you want your kkakdugi to last longer, refrigerate immediately and taste in 6-7 days, if you can’t wait to eat it, leave it out in room-temperature for 1-2 days and then refrigerate and try it 2 days after. It will take a couple weeks for the flavor to fully-develop, but if you are like me and can’t wait, waiting one week is fine for some fresher-tasting kkakdugi!
- Hope you enjoy!
Spaghetti alla Carbonara
November 13, 2011 § 2 Comments
Recently, I found myself craving carbonara. Not the peas, bacon, and cream-kind, the legit egg-yolk infused Parmesan-deliciousness. At first, I wanted to try two different recipes and see which one I liked better. But after making the first one, there was no need to try another recipe because it was so fantastic. I made some variations on Tyler Florence’s original recipe below.
Notes:
1. Use pasta water to thin out the sauce a little bit. I used about 1/2 cup.
2. Make sure you take the pan off the flame when adding the egg/cheese mixture so the eggs don’t get scrambled.


Spaghetti alla Carbonara Recipe
Ingredients
- 1 pound dry spaghetti
- 2 tablespoons extra-virgin olive oil
- 4 ounces pancetta or slab bacon, cubed or sliced into small strips
- 4 ounces of prosciutto, sliced thinly into ribbons
- 6 garlic cloves, finely chopped
- 2 large eggs
- 1 cup freshly grated Parmigiano-Reggiano, plus more for serving
- Freshly ground black pepper
Directions
Prepare the sauce while the pasta is cooking to ensure that the spaghetti will be hot and ready when the sauce is finished; it is very important that the pasta is hot when adding the egg mixture, so that the heat of the pasta cooks the raw eggs in the sauce.
Bring a large pot of salted water to a boil, add the pasta and cook for 8 to 10 minutes or until tender yet firm (as they say in Italian “al dente.”) Drain the pasta well, reserving 1/2 cup of the starchy cooking water to use in the sauce if you wish.
Meanwhile, heat the olive oil in a deep skillet over medium flame. Add the pancetta and saute for about 3 minutes, until the bacon is crisp and the fat is rendered. Add the ribbons of prosciutto and saute for 1 minutes. Toss the garlic into the fat and saute for less than 1 minute to soften.
Add the hot, drained spaghetti to the pan and toss for 2 minutes to coat the strands in the bacon fat. Beat the eggs and Parmesan together in a mixing bowl, stirring well to prevent lumps. Remove the pan from the heat and pour the egg/cheese mixture into the pasta, whisking quickly until the eggs thicken, but do not scramble (this is done off the heat to ensure this does not happen.) Thin out the sauce with a bit of the reserved pasta water, until it reaches desired consistency. Season the carbonara with several turns of freshly ground black pepper and taste for salt. Mound the spaghetti carbonara into warm serving bowls and garnish with chopped parsley. Pass more cheese around the table.
Kimchi Jjigae 김치찌개
October 18, 2011 § 3 Comments
There are a million different ways to make Kimchi Jjigae 김치찌개, and I think I’ve tried about 999,999 of them. 🙂 THIS, however, is the most foolproof, most simple, most delicious kimchi jigae ever, and I really hope you try it since it’s the easiest thing to make.
Notes:
1. You can use either pork or beef, but pork definitely imparts a more velvety-flavor that goes hand in hand with kimchi. Mmm….
2. Pork belly is also great for this, but perhaps a little more fatty (is this a bad thing?)
3. If you are using the last of your kimchi, don’t just throw away the jar! Pour some water in there and pour the little juices/spices into the stew. The more flavor, the better.
4. Must eat with rice.
5. Feel free to add tofu or vermicelli noodles!


Kimchi Jigae Recipe – Kimchi Stew
Ingredients
- 2 tbsp vegetable/canola oil
- 1 tbsp sesame oil
- 1 lb pork belly, loin, or rib, sliced thinly
- 1/2 tsp coarse sea salt
- 1/4 tsp black pepper
- 4 cups ripe kimchi
- 3 1/2 cups water (use around 2-3 tbsp kimchi juice from container)
Directions
- Heat oil in heavy-pot on medium-high. Add sliced pork, salt, and pepper and saute until nice and golden, 3~4 minutes.
- Add 4 cups of ripe kimchi to the pot and stir-fry with the pork around 5 minutes.
- Add 3 1/2~4 cups of water (or until kimchi and pork are JUST covered) and simmer on medium heat, covered, for 40-45 minutes.
- ENJOY!!
Kalbi Jjim – Korean Braised Short Ribs with Radish and Carrots
October 16, 2011 § 4 Comments
Dear Korean Food,
I love you.
Love,
Stephanie
Kalbi jjim, galbi jjim, any way they’re spelled, these Korean-style braised short ribs are perfect. With only just a few ingredients and around two hours, you will end up with a foolproof, delicious, and impressive meal. This entry is for you my little Bobo 🙂 And thank you, chapster, for all of your help.
Notes:
1. When reserving the beef broth, make sure you discard all the foam and impurities in the broth.
2. Make sure you rinse the ribs really well and drain fully to get most of the tiny bone fragments out.
3. Cook covered for the first hour and half, on medium low heat, and then after you add the vegetables, uncover and cook on medium high heat for the last thirty minutes to reduce some of the sauce.
4. Many people like putting potatoes in, and up to a couple years ago, so did I! But, I found that the broth is much cleaner, light, and more consomme-esque without potatoes but for a heartier meal, feel free to put some in.


Kalbi Jjim Recipe – Korean braised short rib
Ingredients
- 5-6 lbs thick English-cut short rib, also called “Beef short rib for soup”
- 8 cups boiling water
- 3/4 cup of soy sauce
- 7 tbsp brown sugar
- 6 tbsp mirin rice wine
- 2 tbsp sesame oil
- 16 cloves garlic, minced
- 1 tbsp sesame seeds
- 1/ tsp black pepper
- 1 large onion or 2 medium onions, sliced thinly
- ~2 cups Korean radish (moo), cut into 1 inch cubes
- 3-4 carrots, cut into 1-inch pieces
Directions
- Soak beef ribs in a big bowl, submerged in cold water for 1 hour. Rinse and drain a few times.
- Boil 6 cups of water in a big pot, and add the ribs when the water is boiling. Bring to a rapid boil for 10 minutes, and you will see lots of foam and impurities come out. Take off the heat, and then reserve around 4-6 cups of the broth and discard the foam and impurities and fat.
- While the beef is boiling, mix the marinade ingredients together in a bowl: soy sauce, brown sugar, rice wine, sesame oil, garlic, sesame seeds, and black pepper.
- Wash the pot well and put the semi-cooked short ribs back to the pot. Turn heat to medium high and add the marinade to the beef, and 4-6 (if you like more sauce, then add the full 6-cups, if you like it more braised and less saucy, 4 cups) cups of the beef broth. Bring to a boil, and then cover and reduce the heat to medium low for an hour and a half, at least (2 hours is better).
- Prepare your vegetables, wash and peel the radish and carrots and onions. (My dogs were begging me for some carrot pieces and how could I refuse those cute little faces?) After the beef has been simmering, add the vegetables and mix well into the pot. Keep the pot uncovered and bring the temperature up to medium high and boil for 30 minutes. The liquid should reduce a bit.
- Serve with hot rice! Enjoy!
Tomato Basil Mozzarella Salad
October 4, 2011 § 2 Comments
My first salad on COZYBOGIE! Which strikes me as a little odd because I eat salad quite frequently…but oh well. 🙂
I wish I could say that I concocted this amazing mixture myself, but again, I have to give credit where it’s rightfully due to my darling Amanda. (She will be on SOON for a delicious guest-post!)
Notes:
1. You can use marinated mozzarella or plain Bocconcino for this, just don’t add as much salt when you use the marinated mozzarella.
2. Heirloom tomatoes taste best with this! But in a pinch grape or cherry tomatoes will do.
3. This is SUPER FAST (20 minutes max – and 15 minutes of that is just waiting) and delicious.
4. I like the ratio of 1 cheese to 2 bites of tomato. But of course, you can switch it up.


Tomato Basil Mozzarella Salad Recipe
Ingredients
- 1 lb heirloom tomatoes, cut into bite-sized pieces if they are too big
- 1 small container of marinated mozzarella or bocconcino
- 1/4-1/2 coarse sea salt (start with 1/4 teaspoon, add more to suit your taste)
- 3 tablespoons extra virgin olive oil
- 1/2 teaspoon ground black pepper
- 1 cup shredded basil leaves
Directions
- Rinse and wash the tomatoes and basil. Place tomatoes in a large bowl for mixing.
- For bite-sized pieces, halve or quarter the cheese and place into the bowl with the tomatoes.
- Sprinkle salt, pepper, and olive oil over the tomatoes and cheese and mix gently so that all is coated.
- Top with the fresh basil leaves, I like to tear them by hand but for a prettier presentation it’s fine to slice them. Mix a few times and let it stand for 15 minutes for the flavors to combine.
- Enjoy!
Basil Fried Rice with Beef
October 3, 2011 § Leave a comment
I have been on a Thai-kick lately! I mean, really, what’s more satisfying than a plate of spicy, delicious, rice/noodles/curry?
I used my creative thinking cap the other day to come up with this dish. Do you ever feel strangely proud when you’re able to use your imagination, past the age of 10? I remember when I was little, I could literally spend hours creating this magical world with my friends or by myself, and only recently realized that it is much harder than it seems! Whenever I babysit or look after little kids and they ask to play or tell them a story, I start getting a little nervous because nothing seems quite as cool or fun as the stories I used to make up. So HUGE kudos to the parents and nannies that have to do it every day. 🙂
Notes:
1. You don’t have to use an expensive cut of beef. I think the one I used was just chuck/stew meat, but the KEY THING IS to cut it as thinly as possible AGAINST THE GRAIN. Then it’ll be nice and tender and easy to chew. To make it easier to slice, you can freeze the beef a little for 1 hour before use.
2. I like a lot of egg in my fried rice, but if you don’t like it as much, you can cut down the number of eggs.
3. Depending on how spicy you like your rice, adjust the hot chili peppers accordingly. I put 3 in, with the seeds, but it wasn’t spicy at all! I think next time I will put in 5.
4. Use day-old rice, preferably chilled. It will be easier to mix.


Basil Fried Rice with Beef Recipe
Ingredients
- 1/2 lb chuck stew meat, sliced thinly against the grain
- 1/4 cup vegetable oil
- 6 cloves of garlic, minced finely
- 3-5 jalapeno peppers, sliced thinly
- 1/2 onion, sliced thinly
- 1 tablespoon fish sauce
- 1 tablespoon Golden Mountain seasoning sauce (or substitute 1 tablespoon soy sauce)
- 3 tablespoons oyster sauce
- 1/4 teaspoon black pepper
- 4-5 cups of day-old cooked rice
- 1 cup of loosely packed basil leaves, rinsed
- 2-3 eggs, scrambled with 1/2 teaspoon of salt
- Sriracha *optional
Directions
- Heat oil in a large wok on medium heat. Add garlic and chili peppers and cook until fragrant and lightly browned, about 30 seconds. Add onions. Cook 30 seconds.
- Increase heat to high. Add the beef, and stir until it is well mixed with the garlic, onions, and chili peppers. Then add the fish sauce, seasoning sauce, black pepper and oyster sauce, and cook until beef is cooked through, about 3-5 minutes.
- After the beef is cooked through, add the rice and break apart clumps and incorporate well into the beef and onions.
- Scramble the eggs in a separate saucepan and mix into the rice after they are just-cooked through.
- After the rice is well mixed and hot, turn off the stove and immediately add your basil leaves. Mix well, and serve! Enjoy. You can add sriracha on top if it’s not that spicy.
Mango Sticky Rice – Thai-style Dessert!
October 2, 2011 § Leave a comment
Happy October everyone!
Back with a vengeance, and starting it off is a delicious Thai dessert – Mango Sticky Rice, or Kow Neuw Mamuang. This is one of those dishes that I always saw on my local Thai restaurant’s menu, but never really got a chance to try. Finally, one extremely hungry day, I ordered my noodles and this dessert and I am so glad I did because it is SO good.
It’s not too sweet, very fresh and light, and overall super satisfying. I looked up some recipes online and decided it didn’t look TOO challenging to try at home, and it definitely wasn’t. I highly encourage you to try this, this is a really beautiful dish and has a lovely presentation (perfect for those dinner parties!).
Though this is super simple, it does require some planning because you need to soak the sweet rice in water overnight to get that perfect chewy texture when it comes time to assemble the dish. Other than that, it takes about thirty minutes to prepare the rest of the dessert.
Notes:
1. Depending on how sweet your mangoes are, adjust your sugar level to your likening. I don’t like overly-sweet desserts so a little less than 1/4 cup was perfect for my tastes.
2. You must use glutinous sticky rice, you cannot use regular rice with a lot of water.


Mango Sticky Rice
Ingredients
- 1 1/2 cups sticky rice (I used short-grain, you can use any type of glutinous rice for this)
- 1 13.5 ounce can of unsweetened coconut milk
- 1/4 cup plus 2 tablespoons white sugar
- 1/4 teaspoon salt
- 2 ripe mangoes
Directions
- Rinse the rice a few times and soak it in water, overnight. In a bind, you can probably get away with soaking for at least one hour, but steaming for much longer.
- Rinse the rice one last time and drain carefully. Place in a steamer lined with a cheesecloth and steam for 20-25 minutes.
- While the rice is steaming, stir one cup of coconut milk and 1/4 cup of sugar and salt together in a small pot, on low heat until the sugar is dissolved. Turn off the heat.
- Once the rice is finished, taste to see if it is chewy and to your liking. If it is undercooked, it will taste crispy and gross. Transfer to a large bowl that has a lid.
- Pour the sweetened coconut milk mixture into the bowl with the rice and mix well so that all the rice is coated. Cover and set aside for 20 minutes for the rice to soak up the milk.
- With the remaining coconut milk, heat on a low simmer with two tablespoons of sugar until the liquid evaporates by one half.
- Peel mangoes carefully and cut into two big halves. Slice each half very thinly, around 2-3 mL thick so that you can make cool shapes with it easily when you plate.
- Using a small custard mold, pour a tablespoon of the sauce into it and coat the inside, then pour out the remaining sauce. Add a few tablespoons of rice to the mold and pack it in, and then carefully transfer the mold of rice onto your serving plate. Then, add your mangoes in any shape you’d like!
- Enjoy!
Bulgogi (불고기 Korean Marinated BBQ Beef)
September 9, 2011 § Leave a comment
This is probably one of the most popular Korean dishes and one of the easiest to make.
1. Probably best to marinate for at least 1 hour, overnight is ideal but 1 hour will still be pretty delicious.
2. This can completely be vegetarian-friendly if you make the sauce for some mushrooms, onions, cabbage, whatever vegetables you’d like, and then grill the same way! I like to marinate some of my onions in the sauce. Another quick and easy snack, served with rice!
3. This can be great for a jungol as well, please see my other post!


Stephanie’s Bulgogi Recipe
Ingredients
- 2.5 – 3 lbs of thinly sliced rib-eye or beef brisket
- 1/2 cup soy sauce
- 10-15 minced garlic cloves (around 3 heaping tablespoons)
- 1/4 cup mirin (rice wine)
- 1/4 cup brown sugar
- 3 tablespoons honey
- 1/4 teaspoon black pepper
- 2 tablespoons sesame oil
- 1 teaspoon sesame seeds
- 3-4 green onions, minced
- 2 onions, sliced thinly
- 1 carrot, sliced thinly at an angle * optional
- mushrooms, sliced thinly * optional
- 2 hot green peppers, sliced thinly * optional
Directions
- Mix all of the ingredients in a large bowl and taste. If you like your sauces a little sweeter, add a little more honey or sugar to your liking.
- Add your beef, onions, and green onion. Toss gently to combine with your hands, that’s the best way. Add other veggies if wanted.
- Marinate for at least one hour (up to overnight), and then grill and cook until the beef is cooked through. (Only a few minutes.)
- Serve with rice and some kimchi, the best combination.
- Enjoy!!
Coffee Cake (The Best Ever.)
September 6, 2011 § 2 Comments
Happy week everyone!
I just came back from a beautiful, relaxing weekend away in Martha’s Vineyard, which is one of my favorite places on earth. My friend and I took the ferry directly from NYC to Oak Bluffs, which was surprisingly lovely. Yes, the two hours of choppy ocean-waves are a bit too much to stomach at times, but it’s nothing that a few glasses of wine can’t cure! My dearest friends from college and I went to our favorite places, picked up some great end-of-summer deals, and ate delicious food. It wouldn’t have been the worst thing in the world if we “accidentally” missed our ferry back… 🙂 Thanks again to my lovely Protrap. 😉
I hope you all had a wonderful weekend as well!
Coffee cake:
1. Surprisingly has zero coffee in it! It’s called coffee cake because it goes so dang well with coffee.
2. This coffee cake is actually sinful. It’s so good. And you might eat the whole thing by accident.
3. MMMMMMMMMMMMMMMMMMM.


Ridiculously Delicious Coffee Cake, The Best Ever Perhaps Recipe
From the Pioneer Woman
Ingredients
- FOR THE CAKE:
- 1-1/2 stick Butter, Softened
- 2 cups Scant Sugar
- 3 cups Flour, Sifted
- 4 teaspoons Baking Powder
- 1 teaspoon Salt
- 1-1/4 cup Whole Milk
- 3 whole Egg Whites, Beaten Until Stiff
- _____
- FOR THE TOPPING:
- 1-1/2 stick Butter, Softened
- 3/4 cups Flour
- 1-1/2 cup Brown Sugar
- 2 Tablespoons Cinnamon
- 1-1/2 cup Pecans, Chopped
Preparation Instructions
Preheat oven to 350 degrees. Sift together flour, baking powder, and salt. Beat egg whites and set aside.
Cream butter and sugar. Add flour mixture and milk alternately until combined. Don’t overbeat. Fold in beaten egg whites with a rubber spatula. Spread in a well-greased 9 x 13 (or LARGER!) baking pan. A cake pan with higher sides would be best.
In a separate bowl, combine topping ingredients with a pastry cutter until crumbly. Sprinkle all over the top.
Bake for 45 minutes, or until no longer jiggly. Serve warm—delicious!
Chili Lobster (Hurricane Lobster Party)
August 27, 2011 § 3 Comments
I am sorry, poor lobsters. 😦 Your sacrifice, due to my horrific murderous actions, was much-appreciated. Thank you!
One of my favorite restaurants in NY is Fatty Crab. Their pork-belly watermelon salad is AMAZING. But the “piece de la resistance” is undoubtedly their chili crab. It is SO delicious. Mop up that sauce with their huge pieces of buttery toast…mmm…mmm….mmm….
But since I am implementing austerity measures, I decided I would try to make an adaptation of the infamous chili-crab recipe at home. With lobster. I think lobster is a little easier to eat because while still-messy, less messy than crab. And it was on sale for $5.99/lb, which is basically a steal. And once, at Fatty Crab, I tried the Chili Lobster instead one day, which was just as amazing as the crab.
Notes:
1. Yes, 4 tablespoons of sriracha does seem like a lot, but I really couldn’t taste that much spiciness! Feel free to start off with 2 (bare minimum) but be liberal, I would actually do 5 next time.
2. Since I couldn’t bring myself to breaking down the lobsters while they were alive, I decided to steam them first and then break them apart. But I am sure if you have more guts than I do, you could break them apart while they are alive and then cook them in the sauce, which might make the meat more flavorful. I actually didn’t mind the light flavoring, especially since I had a lot of sauce that I could dip my lobster-meat into.
3. The original recipe called for some cornstarch, but my sauce was pretty thick so I didn’t put it in. But I’m guessing that this will help the sauce coat the lobster better, so I suppose you could always give it a try!
4. This was really good, doesn’t really remind me of Fatty Crab’s too much (in a league of their own) but it was still super delicious! I will absolutely make this again and again.
5. Stay safe from the Hurricane everyone!
6. I hope I don’t lose too many visitors after this post…I truly did feel bad for those little guys. But they tasted pretty damn good…


Stephanie’s Hurricane Chili Lobster
Adapted from NY Times
Ingredients
- 4 tablespoons sriracha
- 3 tablespoons soy sauce
- 1 tablespoon Golden Mountain seasoning sauce
- 2 tablespoons sugar
- 3 tablespoons rice-wine vinegar (or 2 tablespoons mirin, 1 tbsp rice vinegar)
- 3 tablespoons tomato paste
- 1 teaspoon sesame oil
- 1 cup water
- 1 cups chopped shallots (about 8 ounces)
- 1 small onion, chopped
- 6-8 cloves garlic, minced
- 1 tablespoon freshly grated ginger
- 1 teaspoon kosher salt
- 2 tablespoons cornstarch* optional
- 2 tablespoons water* optional
- 1 tablespoon peanut oil
- 3-4 1 3/4-2 lb lobsters, steamed, cleaned and split, large claws slightly cracked
- 1 egg yolk, beaten
- cup chopped scallions for garnishing
Directions
- Bring a large pot of water to a boil, with a steamer. Be careful not to let the water level be higher than the steamer, just-touching is fine. Bring the water to a boil, and then carefully drop those lovely lobsters into the pot and close the lid immediately. :*( Then steam for about 18-20 minutes. Remove from heat and cool. After cooled, break them apart, taking the claws, tail, and legs off and reserving the head for soup stock if desired. Remove the gills and innards (greyish/greenish yucky stuff) and roe (orange/red stuff). Crack the claws and segment the tail carefully. Set the lobster pieces aside, you can do this up to one night before.
- In a large bowl, whisk the sriracha, soy sauce, sugar, Golden Mountain sauce, rice-wine vinegar, tomato paste and sesame oil with 1 cup of water and set aside.
- Place the shallots, garlic, ginger and salt in the bowl of a food processor. Pulse until the mixture becomes a smooth paste. In a small bowl, whisk together the cornstarch with 2 tablespoons water.
- Heat the peanut oil in a wok over high heat, and when it shimmers, add the shallot paste and fry for 2 minutes until very fragrant. Add the chili sauce, and when the liquid simmers, continue to cook for 5 minutes on medium low heat (it may start to splatter, lower heat if this happens).
- Add the lobster and coat well with the sauce, keeping the heat at medium.
- Add the cornstarch paste if you want your sauce to be thicker, now, and cook for 2 minutes.
- Add the egg yolk to the sauce and stir immediately into the sauce so it is a smooth consistency. Coat the lobster pieces.
- Turn off the heat and serve the lobster with lots of rice or toast, and a LOT of napkins!
- Enjoy!!
